I was contracted by an active client (teagarden1.jp) of mine to take some pictures of some tea products for an online shopping site. After signing on to the deal, here are some things that I like to share with you that can improve your product photography skills.

After setting up my portable studio at a private vacant room at the Tea Garden premises, I decided to use my 70-200mm F2.8L II USM telephoto lens. So why a telephoto lens?
Contrary to what many people may think about telephoto lenses the reason I decided to use my favorite Canon white lens for this shoot is because not only are they great for shooting sports, animal life, and any activity where distance is a main factor, the 70-200mm is also a great lens for product photography.
The Three Reasons
Here are my main three reasons with an explanation:
- It’s super sharp
- Has a minimum focusing distance from 3.9 feet.
- And it being a telephoto, it hardly has any noticeable barrel distortions that can skew the looks of the products.
The 70-200mm F2.8L II USM is to me the sharpest zoom lens on the Canon line. I have heard that the only lens that can beat this bad boy in sharpness is the EF 85 F1.2L Prime. I’m not going to refute that because many primes are are well known for their sharpness. But I would like to actually test and compare it for myself soon.
The min focus distance of 3.9 feet gives me enough space to place my lights in front of my subject while being able to zoom pass my front lights to picture only the subject. Regardless of what many people think, I really think my telephoto lens is great for macro and product photography.
I decided to use a telephoto lens because from my past experiences, I barely see any barrel distortions on this lens especially when using it at 100mm+. However, if I do see a barreling effect, lets say at 70mm, it’s easily correctable during post processing.
What I used
I used the 5D Mark 2 with the EF 70-200mm F/2.8L IS II USM, a tripod, two studio light banks with twin bulb mounts, a light box, and a table cloth. That’s it! I was going to use my standard all white cloth background but I thought it would be too plain and I wanted to express something exclusively from the Tea Garden. Since their table cloths are used on all their tables and seen by all their customers I thought I use it (it was a last minute thought!)
Just a word… You don’t really need to have to use such high-grade equipment to take product photographs but it does help with the convenience of time and professionalism. In the past, I used hand-made light boxes with standard light bulbs for my studio, but as my business grew, I started upgrading my gear with the best out there that I can afford…. and you know what, it doesn’t even hurt the wallet.
Some thoughts… it’s always good to start small than start out big. When you start small, you really learn how to make things on your own. Especially if you don’t have much money to begin with. With little money on hand, most willingly people learn to become very efficient and creative with all sorts of things. Furthermore, when you do grow and are able to afford better gear, YOU CARRY ON THE QUALITIES OF BEING EFFICIENT AND YOU WILL APPRECIATE YOUR EXPENSIVE GEAR MORE because you will see the difference in quality if any between a cheap shit gear and a high grade gear.
The Setup
As I am writing this, I keep wondering why I didn’t take a picture or set up a gopro cam and do a time lapse of my setup! I guess I was too focused on my work without realizing I was going to blog about it later!
Anyways, I had one light mounted on top of the light box and another light in the front about 30 degrees to the side.The camera was centered about 4 feet away while my assistant was next to the light box ready to switch out the products after each shoot. There were four sets of packages having about 10 products per each set so in order to work efficiently and with little time, I shot and handled the lighting, while my assistant switched out the product and covered the layout.
How I Shot
I shot in manual mode and a 2 second delay time to minimize any motion blur.
The results…
Here you go.

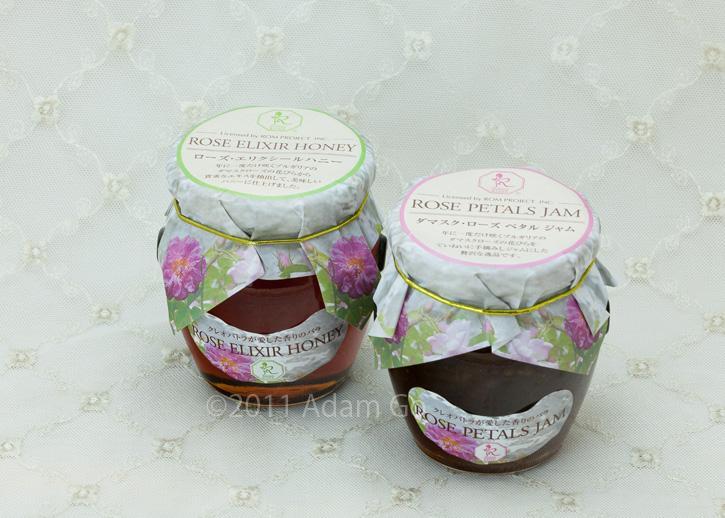
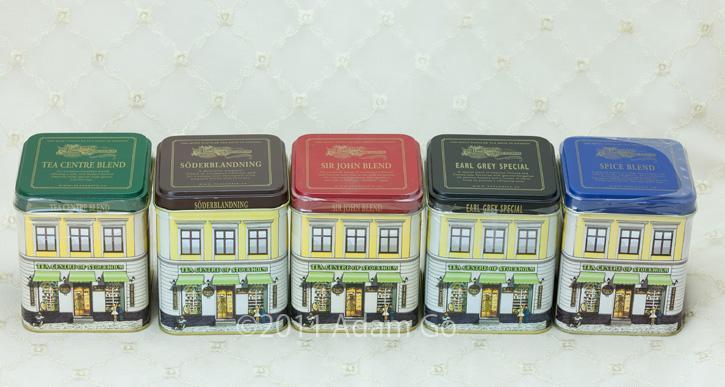
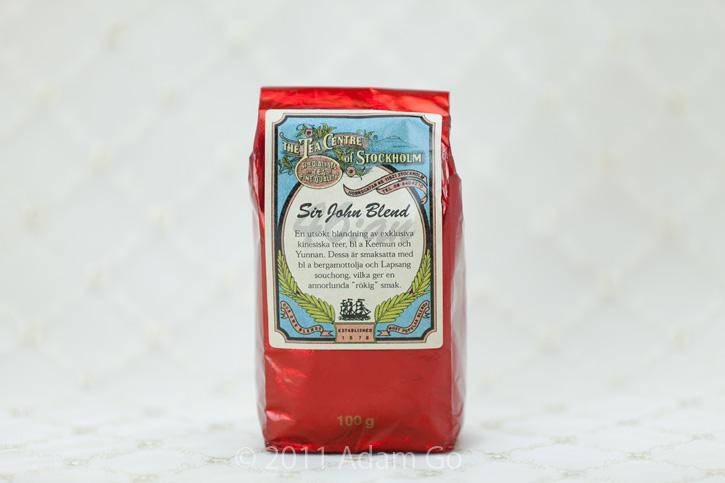
I want to show more but there’s just too much!
To Bokeh or Not to Bokeh… that is the question.
In product photography, it may seem that no bokeh would be the standard shot. However I wanted to do something creative. Usually for product photography, any part of your products should not be blurred especially when the product is viewed online on a shopping site. Nothing on the subject should be hidden, or blurred.
But through my reasoning, as long as the subject is shot properly and able to sell, I don’t see any reason why bokeh and trying to express some depth of field can’t be achieved.
Also, it seemed pretty cool to put full bokeh (F/2.8) into my pics but realized that a partial bokeh (F/5.6~9.0) would do just fine. It’s interesting to note that going wide open on the EF 70-200mm does cause some vignetting and the background tends to be much darker than it is without bokeh. However, it depends on your creativity in producing a nice great shot. Sometimes it would be necessary to break the rules.